
HOME
What Software Do I Need to Create Custom Mylar Bags?

Crafting the perfect custom Mylar bag isn’t just about aesthetics; it’s about blending design, functionality, and brand identity into one cohesive package. Whether you’re looking to create printed Mylar bags for gourmet snacks, high-end cosmetics, or cutting-edge electronics, having the right software can make all the difference.
Let’s dive into the essential tools you need to bring your custom Mylar pouches, personalized Mylar bags, and customized Mylar bags to life. Plus, we’ll spotlight how brandmydispo can elevate your packaging game to extraordinary heights.
Why Software Matters for Custom Mylar Bags
Choosing the right design software is crucial for creating professional and effective packaging. Here’s why:
- Precision: Ensures accurate dimensions and alignments.
- Creativity: Offers a wide array of design tools and effects.
- Efficiency: Streamlines the design process with user-friendly features.
- Professionalism: Produces high-resolution designs suitable for printing.
Must-Have Software for Creating Custom Mylar Bags
1. Adobe Illustrator
Adobe Illustrator is the gold standard for vector graphics. It’s perfect for creating scalable designs that maintain their quality at any size.
Key Features:
- Vector Design: Precise and scalable without loss of quality.
- Advanced Typography: Extensive font options and text effects.
- Color Management: Robust tools for ensuring color accuracy.
- Integration: Works seamlessly with other Adobe products like Photoshop and InDesign.
2. Adobe Photoshop
Adobe Photoshop is the go-to for raster graphics, excelling in photo editing and complex image manipulation.
Key Features:
- Photo Editing: Superior tools for retouching and enhancing images.
- Layer Management: Allows for complex designs with multiple layers.
- Smart Objects: Non-destructive editing for easy adjustments.
- Filters and Effects: A vast array of filters and effects to enhance your design.
3. CorelDRAW
CorelDRAW is a robust vector graphics editor known for its user-friendly interface and comprehensive design tools.
Key Features:
- Vector Illustration: Ideal for detailed vector graphics.
- Page Layout: Great for multi-page design layouts.
- Color Tools: Advanced color management options.
- Interactive Features: Supports interactive and web-based design elements.
4. Affinity Designer
Affinity Designer offers many of the same features as Adobe Illustrator but at a more affordable price.
Key Features:
- Vector and Raster Design: Combines vector and raster tools in one application.
- Precision Guides: Precise alignment and snapping tools.
- Performance: Optimized for fast performance even with complex designs.
- Non-Destructive Editing: Easy adjustments and revisions.
5. Inkscape
Inkscape is a free, open-source vector graphics editor that’s great for budget-conscious designers.
Key Features:
- Vector Graphics: Comprehensive suite of vector design tools.
- File Format Compatibility: Supports SVG and other common formats.
- Customization: Highly customizable interface and tools.
- Community Support: Active community and extensive online resources.
6. Canva
Canva is a web-based design tool perfect for beginners and non-designers.
Key Features:
- Templates: Pre-designed templates for quick and easy designs.
- Drag-and-Drop Interface: User-friendly with drag-and-drop functionality.
- Stock Photos and Graphics: Access to a vast library of images and graphics.
- Collaboration: Easy to collaborate with team members.
7. Packaging Design Software
For specialized needs, there are software tools specifically designed for packaging:
- ArtiosCAD: Comprehensive packaging design software supporting 3D modeling and structural design.
- Esko Studio: Specialized tools for packaging design, including 3D visualization and prepress preparation.
The Design Journey: From Concept to Creation
Step 1: Conceptualization
Begin with brainstorming and sketching out your ideas. Consider your product, target audience, and brand identity.
Step 2: Design Creation
Using your chosen software, start crafting the design. Focus on the following elements:
- Logo and Branding: Incorporate your brand’s logo and colors.
- Graphics and Images: Add relevant images and graphics.
- Text and Typography: Ensure text is clear and legible.
- Layout and Composition: Arrange elements in a balanced and visually appealing way.
Step 3: Mockup Creation
Create a mockup to visualize how your design will look on the actual bag. This can be done using Photoshop or online mockup generators.
Step 4: Feedback and Revisions
Share the mockup with stakeholders for feedback and make necessary revisions.
Step 5: Finalization
Once the design is approved, finalize the files and prepare them for printing. Ensure all elements are in high resolution and colors are accurate.
Taking Your Packaging to the Next Level with brandmydispo
When it comes to crafting top-tier custom Mylar bags, brandmydispo is your go-to partner. Here’s what sets brandmydispo apart:
Expertise and Innovation
brandmydispo brings a wealth of experience and cutting-edge technology to your packaging needs. Their team of experts understands the intricacies of Mylar bag design and works closely with clients to deliver exceptional results.
Customization Options
From sizes and shapes to special features like resealable zippers and clear windows, brandmydispo offers endless customization options. Their advanced printing technology ensures your designs are vibrant and eye-catching, making your products stand out on the shelves.
Sustainable Practices
Committed to sustainability, brandmydispo provides eco-friendly Mylar bags made from recyclable and biodegradable materials. This helps you reduce your environmental footprint while offering high-quality packaging.
Competitive Pricing
Quality packaging doesn’t have to come with a hefty price tag. brandmydispo offers competitive pricing without compromising on quality. Their efficient production processes and bulk ordering options help you save money while ensuring your packaging is top-tier.
Customer-Centric Approach
brandmydispo believes in building lasting relationships with their clients. Their customer-centric approach ensures that your needs and preferences are always a priority. From the initial consultation to the final delivery, their team is dedicated to providing you with a seamless and satisfying experience.
Fast Turnaround Times
In the fast-paced business world, timing is crucial. brandmydispo understands this and offers fast turnaround times without sacrificing quality. They work diligently to meet your deadlines, ensuring your products are ready to hit the shelves on schedule.
Conclusion
Choosing the right software for creating custom Mylar bags is essential for producing high-quality, eye-catching packaging. Whether you’re using industry-standard tools like Adobe Illustrator and Photoshop, exploring cost-effective alternatives like Affinity Designer and Inkscape, or leveraging beginner-friendly platforms like Canva, the key is to find the software that best meets your needs and skill level.
Partnering with a reliable provider like brandmydispo can take your packaging to the next level, ensuring your designs are not only visually stunning but also perfectly suited to your product and brand. With the right tools and partners, you can create custom Mylar bags that truly stand out and make a lasting impression.
Start creating with brandmydispo today and watch your products shine with custom printed Mylar bags that truly make a difference.
Introduction
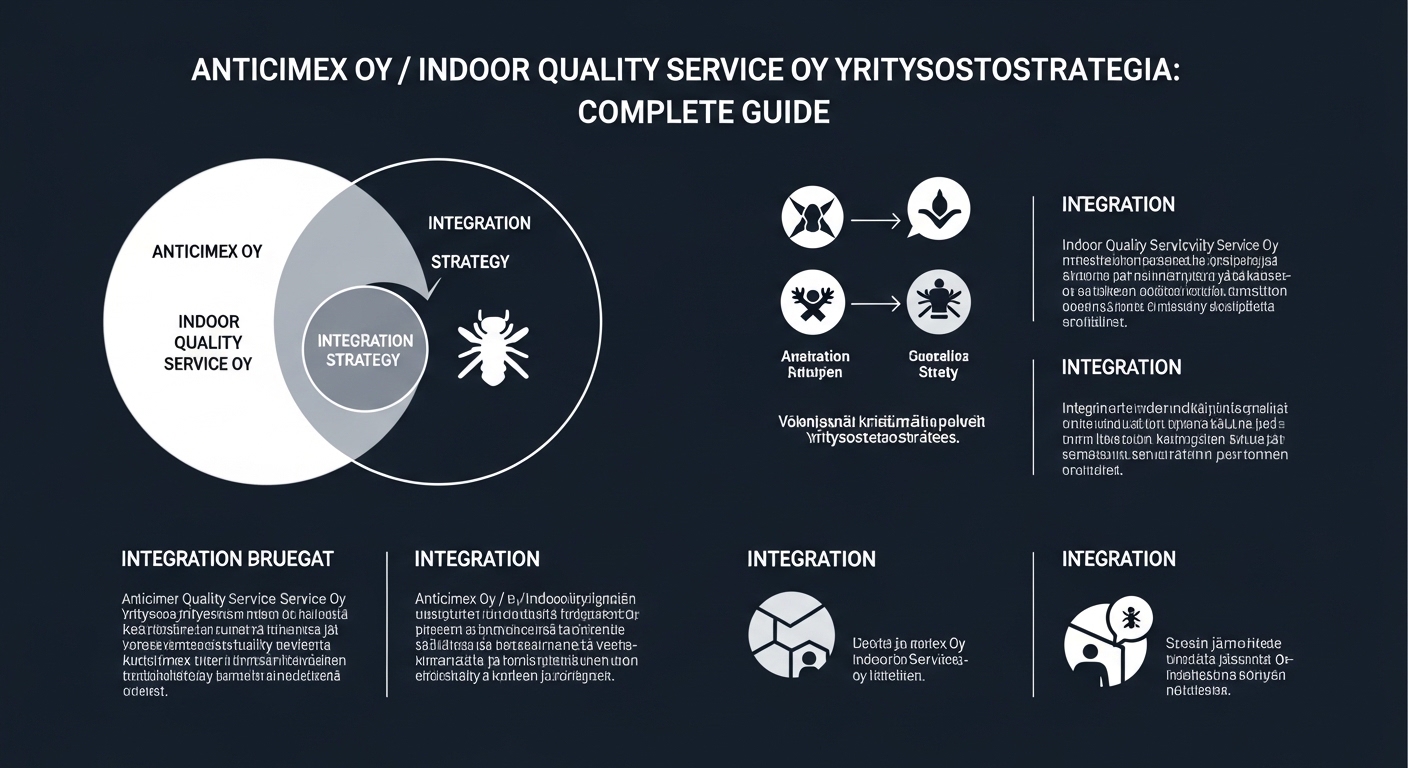
The Anticimex Oy / Indoor Quality Service Oy yritysostostrategia has become a notable topic in discussions around business expansion, service innovation, and market consolidation in the environmental services industry. Companies today are increasingly relying on acquisitions to expand expertise, strengthen market position, and enhance customer value. This strategy reflects a broader trend where specialized service providers join forces to deliver integrated solutions in pest control, hygiene, and indoor environmental quality.
What is Anticimex Oy / Indoor Quality Service Oy Yritysostostrategia?
The Finnish term Anticimex Oy / Indoor Quality Service Oy Yritysostostrategia translates to acquisition strategy in English. It refers to a company’s planned approach to growth by purchasing or merging with another business. Rather than building new capabilities from scratch, organizations use acquisitions to:
- Enter new markets quickly
- Expand service offerings
- Gain technical expertise
- Improve operational efficiency
- Increase customer base
When applied to the Anticimex Oy / Indoor Quality Service Oy yritysostostrategia, the focus is on combining complementary services to create stronger environmental and indoor quality solutions.
Background of the Strategic Acquisition
The collaboration between Anticimex Oy / Indoor Quality Service Oy Yritysostostrategia represents a strategic move aimed at strengthening capabilities in indoor environmental management. The acquisition approach focuses on integrating expertise in:
- Pest control and prevention
- Indoor air quality management
- Moisture and mold assessment
- Environmental monitoring
- Property health services
This combined approach helps deliver comprehensive solutions for residential, commercial, and industrial clients.
Key Objectives of the Acquisition Strategy
1. Expanding Service Portfolio
One of the primary goals of the Anticimex Oy / Indoor Quality Service Oy yritysostostrategia is to broaden service offerings. By combining strengths, the organization can provide:
- Integrated indoor health solutions
- Preventive environmental services
- Data-driven monitoring tools
- Building inspection services
This diversification increases value for customers and enhances competitiveness.
2. Strengthening Market Position
Acquisitions often help companies gain a stronger foothold in competitive markets. By merging resources and expertise, the strategy aims to:
- Increase market share
- Improve brand recognition
- Enhance customer trust
- Expand geographic coverage
A stronger market presence supports long-term growth and stability.
3. Enhancing Technical Expertise
Indoor environmental quality requires specialized knowledge in multiple areas. The acquisition strategy allows the combined organization to leverage:
- Advanced inspection technologies
- Scientific analysis tools
- Professional expertise in building health
- Preventive maintenance methodologies
This technical enhancement improves service accuracy and efficiency.
4. Improving Customer Experience
Customers increasingly demand comprehensive services instead of dealing with multiple vendors. The strategy focuses on delivering:
- One-stop environmental solutions
- Faster service response times
- Coordinated inspections and treatments
- Consistent quality standards
This streamlined approach benefits both property owners and facility managers.
Benefits of the Anticimex Oy / Indoor Quality Service Oy Yritysostostrategia
1. Integrated Environmental Services
The acquisition allows for a unified approach to environmental health. Instead of separate services, clients receive combined pest control and indoor quality management solutions.
2. Operational Efficiency
Combining operations reduces duplication and improves resource allocation. This results in:
- Lower operational costs
- Faster service delivery
- Better use of technology
- Improved scheduling
3. Innovation and Technology Adoption
Acquisition strategies often accelerate innovation. The collaboration supports:
- Digital monitoring systems
- Smart building solutions
- Predictive maintenance tools
- Data-driven decision-making
4. Stronger Industry Leadership
The Anticimex Oy / Indoor Quality Service Oy yritysostostrategia contributes to industry leadership by creating a more capable organization with broader expertise.
Impact on Customers
Customers benefit significantly from this acquisition strategy. The key advantages include:
- Comprehensive indoor environmental assessments
- Preventive pest control solutions
- Improved building health monitoring
- Reduced risk of mold and moisture issues
- Better long-term property value
Property managers, homeowners, and businesses gain access to integrated services that improve indoor conditions and safety.
Industry Implications
The environmental services sector is evolving rapidly. The Anticimex Oy / Indoor Quality Service Oy yritysostostrategia reflects several important industry trends:
Consolidation of Specialized Services
Companies are merging expertise to offer holistic solutions rather than isolated services.
Increased Focus on Indoor Air Quality
Growing awareness of indoor health has made air quality management a top priority.
Data-Driven Environmental Management
Technology-based monitoring systems are becoming standard in modern buildings.
Preventive Maintenance Approach
Businesses are shifting from reactive services to proactive environmental protection.
Strategic Advantages for Business Growth
Acquisition strategies often provide long-term benefits. These include:
Faster Expansion
Instead of building new departments, acquisitions allow immediate access to established expertise.
Reduced Market Entry Risk
Acquiring an existing company reduces uncertainty associated with entering new service areas.
Shared Knowledge
Combined teams share best practices and improve overall service quality.
Stronger Competitive Edge
A broader service portfolio helps attract larger clients and long-term contracts.
Challenges and Considerations
While acquisition strategies offer many benefits, they also involve challenges such as:
- Integrating company cultures
- Aligning operational processes
- Maintaining service consistency
- Managing customer expectations
- Ensuring smooth technology integration
Successful implementation requires careful planning and communication.
Future Outlook
The Anticimex Oy / Indoor Quality Service Oy yritysostostrategia reflects a long-term vision focused on sustainability, innovation, and customer-centered services. Future developments may include:
- Expansion into new regions
- Adoption of smart building technologies
- Enhanced digital monitoring platforms
- Sustainable environmental solutions
- AI-driven predictive maintenance
These advancements will further strengthen indoor environmental management services.
Why This Strategy Matters
The acquisition strategy is significant because it addresses modern challenges in building health and environmental safety. With increasing urbanization and stricter regulations, integrated services are becoming essential.
The Anticimex’s Oy / Indoor Quality Service Oy yritysostostrategia supports:
- Healthier indoor environments
- Sustainable property management
- Improved operational efficiency
- Enhanced customer satisfaction
- Long-term business growth
Conclusion
The Anticimex Oy / Indoor Quality Service Oy yritysostostrategia represents a strategic move toward comprehensive environmental service delivery. By combining expertise in pest control, indoor air quality, and building health, the acquisition strengthens service capabilities and enhances customer value.
FAQ’s
What does Anticimex’s Oy / Indoor Quality Service Oy yritysostostrategia mean?
It refers to an acquisition strategy where expertise in pest control and indoor environmental quality is combined to provide integrated services.
Why was this acquisition strategy implemented?
The strategy aims to expand services, strengthen market position, and improve customer experience through combined expertise.
How does this strategy benefit customers?
Customers receive comprehensive indoor environmental solutions, improved service efficiency, and better long-term building health.
What industries benefit from this acquisition?
Property management, construction, real estate, and facility services benefit the most from integrated environmental solutions.
Does the strategy support innovation?
Yes, it promotes digital monitoring, smart building technologies, and data-driven environmental management.
Is acquisition strategy common in environmental services?
Yes, many companies use acquisition strategies to expand expertise and provide holistic environmental solutions.
The luxury real estate market is undergoing significant transformations, driven by evolving buyer preferences and technological advancements. Understanding these trends is crucial for both buyers and sellers aiming to navigate this dynamic landscape effectively. For those interested in exploring properties that embody these modern trends, the Breitenbach Advisory Team offers a curated selection of Southampton NY homes for sale. With over 15 years of experience and more than $3 billion in Hamptons real estate transactions, the Breitenbach Advisory Team, led by CEO and Managing Principal Broker Matt Breitenbach, provides unparalleled expertise in the luxury market.
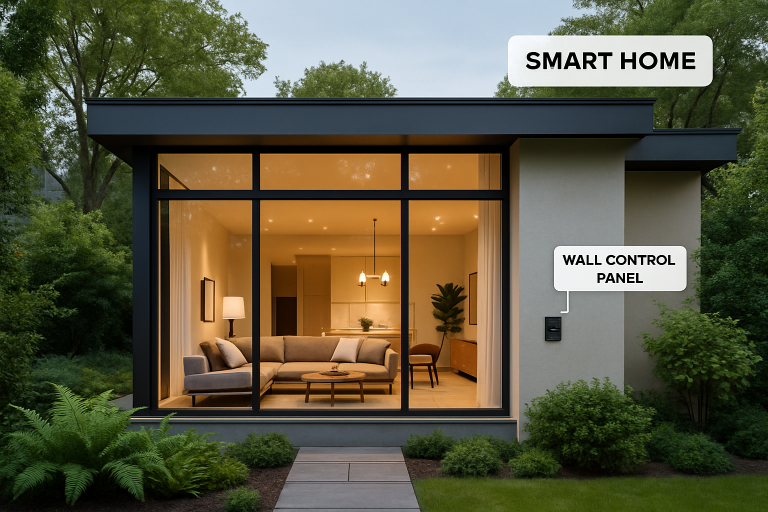
Integration of Smart Home Technologies
Modern luxury homes are embracing advanced technologies to enhance convenience and security. Features such as AI-powered assistants, automated lighting, and climate control systems have become standard expectations among affluent buyers. These innovations not only enhance the quality of life but also contribute to energy efficiency and sustainability. For instance, properties equipped with voice-controlled systems and remote monitoring capabilities are increasingly sought after.
Emphasis on Sustainability and Eco-Friendly Designs
Sustainability has become a cornerstone in luxury real estate. Buyers are seeking homes built with eco-friendly materials and equipped with renewable energy sources, such as solar panels and geothermal heating systems. This shift reflects a growing commitment to environmental responsibility without compromising on luxury. Incorporating green building practices not only reduces the carbon footprint but also offers long-term cost savings.
Wellness-Oriented Amenities
Health and wellness have taken center stage in luxury living. Properties now often feature home gyms, spa-like bathrooms, meditation rooms, and advanced air and water filtration systems. These amenities cater to a holistic lifestyle, promoting physical and mental well-being within the comfort of one’s home. The inclusion of such features underscores the importance of wellness in contemporary luxury residences.
Personalization and Customization
Today’s luxury buyers desire homes that reflect their personal tastes and lifestyles. This trend has led to increased demand for customizable features, from adaptable floor plans to bespoke interior designs. Personalized wine cellars, home theaters, and art studios are examples of how properties are tailored to meet individual preferences, enhancing the home’s uniqueness and value.
Shift Towards Non-Urban Locations
There is a notable movement away from urban centers to suburban and rural areas. High-net-worth individuals are investing in properties in locations like Aspen, the Hamptons, and Napa Valley, seeking privacy, tranquility, and scenic natural surroundings. This trend underscores a desire for spaces that offer both luxury and a retreat from the chaos of city life. It’s a move toward finding balance and serenity in more remote, picturesque locales.
Enhanced Security Measures
Security remains a top priority for luxury homeowners. Advanced systems, including biometric access controls, AI-driven surveillance, and secure safe rooms, are becoming standard. These measures provide peace of mind and protect valuable assets, reflecting the heightened demand for privacy and safety in high-end properties.
Expansion of Outdoor Living Spaces
Another major trend shaping luxury real estate is the growing importance of exceptional outdoor living spaces. Buyers are prioritizing expansive patios, resort-style pools, outdoor kitchens, and even private gardens or vineyards. Whether used for entertaining guests or relaxing with family, these exterior amenities greatly enhance a property’s appeal. In climates like the Hamptons, inviting outdoor lounges with fire pits, sophisticated landscaping, and seamless indoor-outdoor transitions create an unrivaled sense of luxury, with a connection to nature.
Advances in landscape architecture have enabled property owners to design outdoor environments that are truly extensions of their interiors, blending privacy with natural beauty. Rooftop terraces, infinity-edge pools, and integrated hot tubs are increasingly popular features, while outdoor fitness spaces, such as yoga decks or basketball courts, offer further opportunities for recreation and self-care at home.
Globalization and the Rise of International Buyers
The luxury real estate market has also become more globalized, with international buyers playing a significant role in many prime markets. Investors from around the world are seeking safe-haven assets, diversified portfolios, and opportunities for second or third homes in prestigious locations. This influx of global capital has led to increased competition for top-tier properties, especially in cosmopolitan areas and exclusive vacation destinations. Sellers and developers are responding by offering multilingual services, bespoke concierge packages, and leveraging digital platforms to reach a worldwide audience.
Art Integration and In-Home Galleries
Another notable trend is the integration of art and culture into the home space. More luxury buyers are curating their own in-home galleries, complete with museum-quality lighting, climate control, and secure storage. Homes are being designed with dedicated art display walls and custom installations to showcase collections and reflect the owner’s unique tastes. This approach transforms living spaces into personal sanctuaries filled with creativity and inspiration. As art increasingly becomes both a personal passion and an investment, its prominent display is now a definitive marker of luxury living.
Evolution of Home Workspaces
The shift to hybrid work and entrepreneurship has prompted luxury homeowners to invest in high-end, tech-enabled home offices. These workspaces go far beyond a simple desk, featuring integrated communication systems, soundproofing, and custom storage solutions. Elegant yet functional, they support productivity while maintaining the home’s overall design aesthetic. This trend is expected to remain highly relevant as remote work continues to be a preferred option for many affluent professionals and business owners.
Conclusion
The luxury real estate market is evolving to meet the sophisticated demands of modern buyers. Embracing smart technologies, sustainable practices, wellness amenities, and personalized designs are key factors driving this transformation. The inclusion of exceptional outdoor living spaces, the influence of international buyers, the importance of home art galleries, and the rise of state-of-the-art home offices further define the changing landscape. For those interested in exploring luxury properties that embody these trends, the Breitenbach Advisory Team offers a curated selection of Southampton, NY homes for sale. With their deep expertise in the Southampton area and a commitment to excellence, they provide unparalleled service in the luxury real estate market.

Keeping your gutter system in optimal condition is one of the most effective ways to protect your home from water damage and costly repairs. Gutters handle more than just rainwater; they safeguard your foundation, siding, and landscaping from the dangers of uncontrolled runoff. Property owners in the Pacific Northwest, including those needing gutter repairs Bellevue, understand the importance of regular maintenance for withstanding frequent rainfall and heavy seasonal storms.
Neglecting your gutters can invite a host of problems, from mold growth to foundation cracks, that quickly escalate in cost and complexity. Addressing small issues today ensures lasting protection for your property’s exterior, ultimately saving time and resources. Even if you have a new, sturdy gutter system, routine checks and proper installation practices remain essential components of your home’s defense strategy.
Consistent care helps identify early warning signs that could otherwise be missed between major storms. There is no substitute for a methodical maintenance approach, especially in regions where seasonal changes bring unpredictable weather patterns.
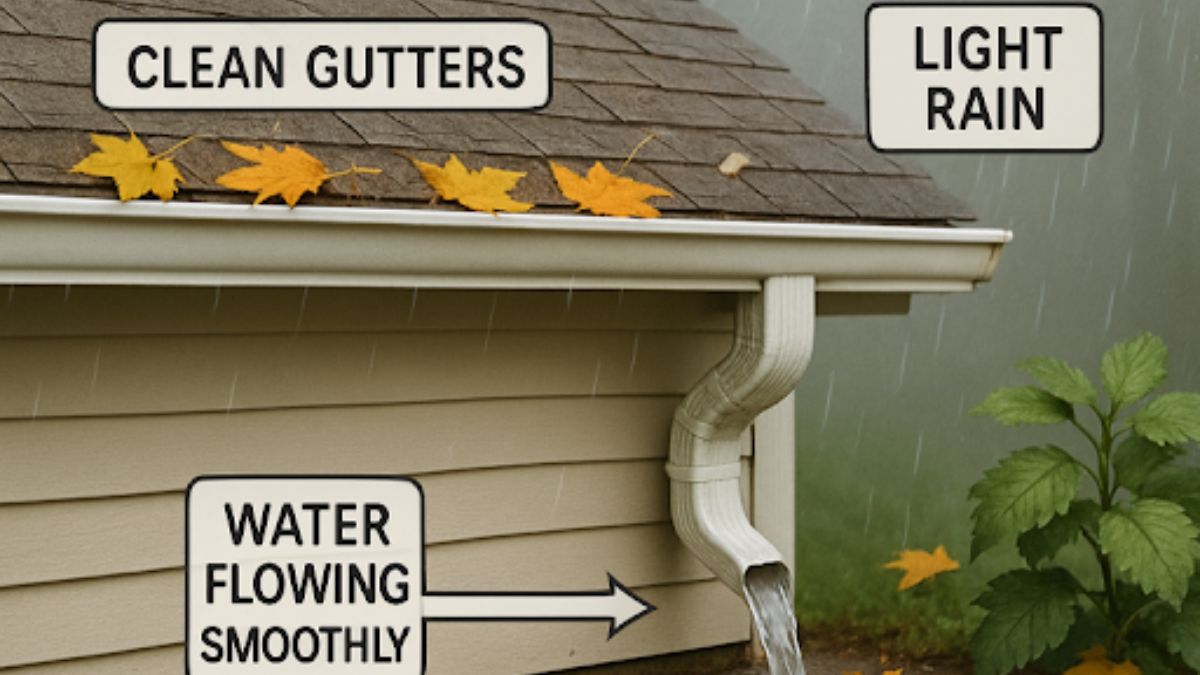
Schedule Regular Cleaning
Gutters are susceptible to debris buildup, especially when surrounded by mature trees or overhanging branches. This debris, whether leaves, twigs, or even shingle granules, can rapidly clog your gutters and cause water to overflow onto your siding and foundation. Experts generally recommend cleaning gutters at least twice each year, typically in the spring and fall. In areas with increased vegetation or frequent windstorms, you might need to clean them even more often to keep water flowing smoothly and to avoid hidden damage inside your walls or basement.
Inspect for Damage
Each cleaning session presents a valuable opportunity to inspect the overall condition of your gutter system. Look for visible cracks, rusted spots, sagging sections, or areas where water escapes instead of being channeled away from your home. Addressing these issues right away prevents small weaknesses from developing into more serious structural concerns. Being proactive will help you avoid costly future repairs and significantlyInstallinghe life of your guttersdownspouts are effectiveutter Guards
One effective way to minimize gutter debris and reduce cleaning frequency is to install gutter guards. These protective covers or inserts help prevent large debris from entering the gutter channels while allowing water to pass through. Gutter guards are especially beneficial in neighborhoods with many trees and can serve as an additional layer of protection during periods of heavy rain or wind. While gutter guards do not eliminate the need for occasional cleaning, they make the process much quicker and simpler.
Ensure Proper Downspout Function
Downspouts play a vital role in any gutter system, safely channeling water away from your home’s foundation. Make sure that each downspout directs water at least five feet from your foundation to prevent soil erosion and basement flooding. Downspouts should be checked regularly for clogs, especially after storms that may carry debris into the pipes. Adjust any misaligned downspouts immediately so that water does not collect near your property’s structural base. For more on the importance of proper drainage, this HouseLogic resource offers useful guidance.
Consider Professional Maintenance
While many homeowners are comfortable with basic gutter maintenance, some prefer the added security of professional expertise. Professional gutter services can provide comprehensive inspections, specialized cleaning tools, and early identification of problems that might be missed by an untrained eye. Homeowners with properties featuring more than one story or complex roofing layouts especially benefit from hiring experienced professionals. Companies like All Pro Gutter Guards continue to expand their capacity to meet the growing needs of diligent homeowners in our communities.
Be Aware of Seasonal Challenges
Every season presents unique challenges for gutter upkeep. During autumn, falling leaves can rapidly choke a gutter system, requiring more frequent checks and cleanings. Spring often brings a combination of heavy rains and blossoming vegetation, both of which put your gutters to the test. In regions prone to severe storms or hurricanes, it is especially important to prepare your gutters to handle sudden downpours and fierce winds. Staying ahead of these challenges helps ensure your system is always ready for what nature brings. The Better Homes & Gardens seasonal home maintenance checklist is an excellent resource for organizing these tasks throughout the year.
Understand the Impact on Roof Maintenance
Your roof and gutter system work together to protect your entire home. Poor gutter performance can go unnoticed by an untrained eye, leading to leaks, ice dams, and damage to your shingles and underlayment. Ensuring that gutters are installed and maintained by knowledgeable professionals helps preserve the integrity of your roof, reducing the risk of water intrusion and energy loss. Advances in installation techniques and materials have made today’s gutters more reliable than ever, further improving overall home protection.
Stay Proactive
Investing in regular inspections after storms, replacing worn-out gutter components, and staying ahead of seasonal changes all contribute to a robust and efficient water management system. The most effective way to ensure long-term success is to make gutter maintenance part of your routine property care. Homeowners who take a proactive approach are rewarded with fewer emergencies, lower repair bills, and peace of mind even during the heaviest rain events.
With these gutter maintenance tips, you can keep your home safe from water-related issues and preserve its value and appearance for years to come.
-

 HEALTH2 years ago
Integrating Semaglutide into Your Weight Loss Plan: A Practical Guide
-
 HOME IMPROVEMENT2 years ago
How to Choose the Perfect Neutral Area Rug for Every Room
-

 FASHION2 years ago
7 Celebrity-Inspired Elegant Summer Dresses For 2024
-

 LAW2 years ago
Teenage Drivers and Car Accidents in California: Risks and Parental Liability
-

 CONSTRUCTION2 years ago
Construction Site Safety Regulations in New York and Your Rights as a Worker
-

 HOME2 years ago
Sandra Orlow: The Teen Model Who Captivated the Internet
-

 LAW2 years ago
Post-Divorce Considerations in California: Modifications and Long-Term Planning
-

 FINANCE2 years ago
Digital Asset Management in Florida Estate Planning