
HOME
How to Load Dymo 30256 Labels into Your Label Writer Printer

Dymo LabelWriter printers are widely recognized for their efficiency and reliability in producing high-quality labels for various purposes. One popular label type is the Dymo 30256, designed for shipping and addressing tasks. Properly loading these labels into your LabelWriter printer ensures smooth operation and avoids frustrating issues like paper jams or misaligned prints. This article provides a step-by-step guide to loading Dymo 30256 labels, along with tips for optimal performance.

Understanding Dymo 30256 Labels
Dymo 30256 labels large shipping labels, measuring 2-5/16” x 4”. They are commonly used for:
- Shipping packages.
- Printing address labels.
- Customizing organizational labels.
These labels come in rolls designed to fit seamlessly into Dymo LabelWriter printers, making them a versatile and convenient option for personal and business use.
Preparing to Load Dymo 30256 Labels
Before you begin, gather the following materials and check your printer setup:
Materials You Need:
- A roll of Dymo 30256 labels.
- A Dymo LabelWriter printer (e.g., LabelWriter 450 or 550 series).
Inspect Your Printer
- Ensure your LabelWriter printer is powered off and unplugged from the power source.
- Check the label spool area for any debris or leftover labels from a previous roll. Clean it if necessary to prevent printing issues.
Organize Your Workspace
Set up your printer in a clean, flat, and well-lit area. Having an organized workspace reduces the risk of mistakes during the label loading process.
Step-by-Step Guide to Loading Dymo 30256 Labels
Step 1: Open the Printer’s Cover
- Locate the cover latch on the top of your LabelWriter printer.
- Press the latch to release the cover and gently lift it open. This action exposes the label spool and feed path.
Step 2: Remove the Empty Spool (If Present)
If a label roll is already in the printer, remove the spool by lifting it out of the holder. Detach the empty roll core from the spool spindle and set it aside.
Step 3: Prepare the New Label Roll
- Take your roll of Dymo 30256 labels and remove any plastic or packaging material.
- Identify the labels’ leading edge, which should be facing outward for proper feeding into the printer.
Step 4: Load the Label Roll onto the Spool
- Separate the two pieces of the label spool by sliding the spindle off.
- Place the roll of Dymo 30256 labels onto the spindle, ensuring the labels unwind from the top and face outward.
- Reattach the second piece of the spool to secure the roll in place.
Step 5: Insert the Spool into the Printer
- Place the loaded spool into the designated holders inside the LabelWriter printer.
- Ensure the labels are aligned and centered in the feed path to avoid skewed prints.
Step 6: Feed the Labels Through the Printer
- Gently pull the leading edge of the labels forward and insert them into the label feed slot.
- Align the edge with the guide marks on the feed path to ensure proper alignment.
- Push the labels in until the printer detects them and automatically feeds them into position.
Step 7: Close the Printer Cover
- Lower the cover and press down firmly until it clicks into place.
- Double-check that the labels are still aligned properly in the feed path.
Step 8: Power On and Test the Printer
- Plug the printer back into its power source and turn it on.
- Use your computer or Dymo Label software to print a test label. Confirm that the labels feed correctly and print as expected.
Troubleshooting Common Issues
Misaligned Prints
- Ensure the label roll is properly seated on the spool.
- Check the guide marks in the feed path and realign the labels if necessary.
Labels Not Feeding
- Verify that the leading edge of the labels is clean and not folded.
- Inspect the label feed slot for any obstructions and clear them as needed.
Paper Jams
- Turn off the printer and carefully remove any jammed labels.
- Reload the labels, ensuring they are aligned and free of creases.
Maintenance Tips for Smooth Operation
- Clean the Printer Regularly: Use a lint-free cloth to clean the label feed path and sensor area.
- Store Labels Properly: Keep your label rolls in a cool, dry place to prevent adhesive issues or label curling.
- Update Printer Software: Ensure your Dymo Label software is up-to-date to avoid compatibility issues.
FAQs About Loading Dymo 30256 Labels
1. Can I use Dymo 30256 labels with all Dymo LabelWriter models?
Dymo 30256 labels are compatible with most LabelWriter printers, including the 450 and 550 series. Always check your printer’s user manual for compatibility details.
2. Why are my labels printing blank?
Blank prints often occur due to incorrect label orientation. Ensure the labels face outward on the spool and the thermal print side is exposed.
3. How can I prevent labels from jamming?
Avoid overloading the label feed path and ensure the labels are aligned with the guide marks. Regularly clean your printer to remove any debris that could cause jams.
By following these steps and tips, you can efficiently load Dymo 30256 labels into your LabelWriter printer and enjoy hassle-free label printing for your projects.

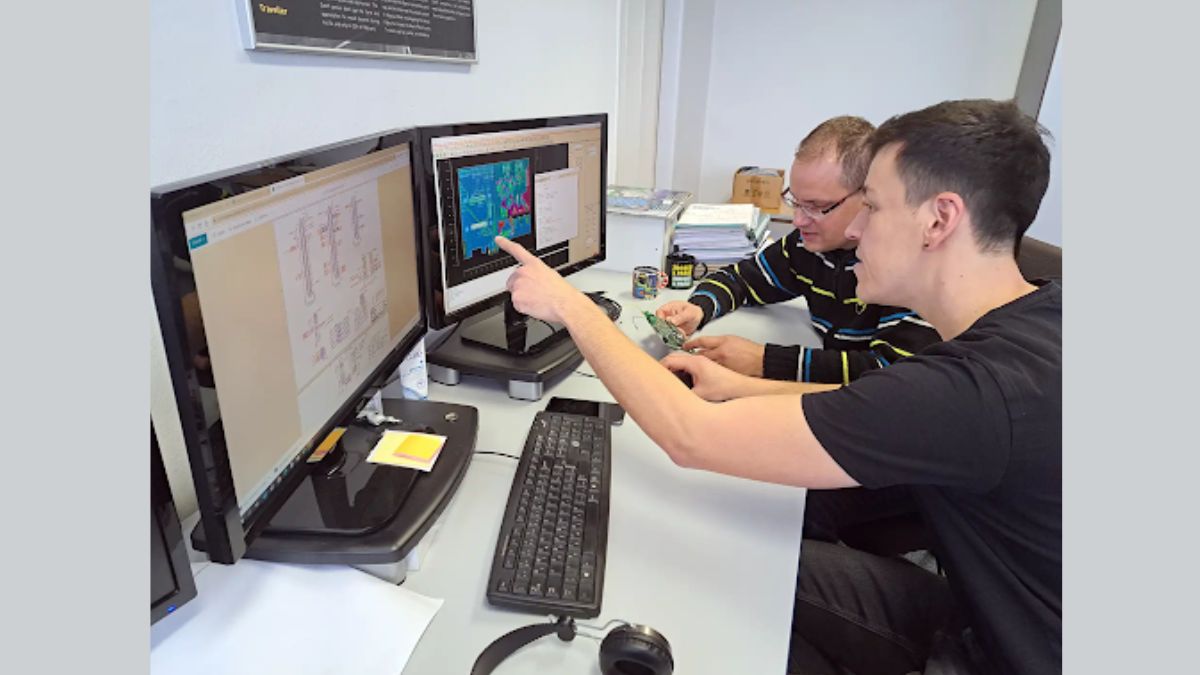
The Rising Demand for High-Performance Computing in Geospatial Industries
Drone footage used to be a nice-to-have for survey teams. Now it’s the baseline, and the datasets coming off it have gotten enormous. A single flight over a mid-size construction site can generate tens of thousands of images, and once you’re stitching that into a point cloud or an orthomosaic, the processing load stops looking like a desktop task and starts looking like something a lot closer to VFX rendering.
That shift is why high-performance computing has quietly become one of the most talked-about topics in surveying, mapping, and GIS circles. Teams that were fine running photogrammetry software on a decent laptop two or three years ago are now watching processing jobs stretch overnight, sometimes longer, because the hardware never scaled with the data.
Why Geospatial Workloads Outgrew Standard Hardware
Photogrammetry and point cloud processing lean hard on both CPU and GPU resources at different stages, which makes them awkward workloads to spec for. Aligning thousands of images needs strong multi-core performance. Building dense point clouds and meshes leans more on GPU throughput and memory bandwidth. A workstation built for general office or CAD work usually handles neither stage well, and that mismatch is exactly where projects start falling behind schedule. LiDAR has made this worse, in a good way – point clouds that used to run in the tens of millions of points now regularly hit the billions on larger infrastructure or corridor projects.
Matching Hardware to the Scale of the Project
For smaller sites and model-scale reconstructions, a Pix4Dmatic Models & Small Maps workstation hits a sweet spot – enough GPU power to move through dense point clouds quickly without paying for headroom that never gets used on a smaller dataset. It’s the kind of setup that makes sense for survey firms handling frequent, smaller jobs rather than a handful of massive ones.
Not every geospatial project has the same footprint, though, and that’s really the crux of the hardware decision. A team mapping a handful of small sites needs something different than a team processing a province-wide utility corridor, even if they’re running the same software on both.
Why Large-Scale Projects Push Hardware Further
Large-area projects are a different story entirely. Processing a wide-area corridor or a multi-square-kilometer site pushes memory and storage requirements well past what a standard build can handle, and that’s where things tend to bottleneck first – not in raw compute, but in how much data the system can actually hold in memory while stitching everything together. A Pix4D’s Pix4Dmatic Large Map workstation is built specifically around that pressure point, with the RAM and storage configuration large-scale reconstructions actually need rather than a scaled-up version of a smaller build.
What Happens When the Hardware Falls Short
The costs of undersized hardware in geospatial work show up quickly, and they’re rarely subtle:
- Processing jobs run overnight, or longer, delaying deliverables to clients
- Crashes mid-process on large datasets force teams to restart hours of work
- Field teams end up waiting on results before they can plan the next flight
- Firms lose bids to competitors who can turn projects around faster
None of this is really about the software being slow. It’s about asking hardware to do more than it was ever built for, project after project, until the gap becomes impossible to ignore.
Planning for Growth, Not Just Today’s Workload
The mistake a lot of firms make is buying hardware for the project in front of them rather than the trajectory they’re actually on. Drone capture resolution keeps climbing. LiDAR density keeps climbing. Client expectations around turnaround time aren’t getting any more relaxed either. A workstation that barely handles today’s datasets is going to struggle within a year, sometimes sooner.
Firms that plan tend to look at where their project sizes are heading over the next 12 to 18 months, not just what’s on the schedule this quarter, before deciding what to invest in.

Final Thoughts
High-performance computing isn’t optional anymore for geospatial teams working with drone and LiDAR data at any real scale. The gap between a workstation that keeps up and one that doesn’t shows up directly in turnaround times, in missed bids, and in field teams sitting idle waiting on results. Matching the hardware to the actual scale of the work, rather than buying generically and hoping it holds up, is the difference – and it’s exactly the kind of matching Cloud Ninjas builds its workstation lineup around.

Magic Hour is the best all-around photo to video ai platform in 2026, thanks to its combination of frontier video models, best-in-class ai face swap video tools, and a free tier that doesn’t require a credit card. Below, we compare it against six other serious contenders so you can pick the right tool for your budget and use case.
Turning a single photo into a moving, believable video used to take a compositing team and a week of rendering. Now it takes a prompt and a few minutes of GPU time. The catch is that “AI video generator” has become a crowded category, and the tools inside it are not interchangeable — some are built for cinematic text-to-video, others for social-first effects, and a handful specialize in the trickiest job of all: making a still photo talk, move, and swap faces convincingly.
This guide focuses on that last group. If you’re a creator, marketer, or developer who needs to animate photos, swap faces in video, or build a talking-photo workflow, here’s what actually works as of mid-2026, what each platform costs, and where each one falls short.
Best Image-to-Video AI Tools at a Glance
| Tool | Best For | Platforms | Free Plan | Face Swap | Lip Sync | API | Starting Price |
| Magic Hour | All-around image-to-video, face swap, lip sync | Web, Desktop, Mobile | Yes, no signup required | Yes | Yes | Full parity | $10/mo (annual) |
| Runway | Cinematic text/image-to-video, editing suite | Web | Yes, limited | Limited | No | Yes | $12/mo (annual) |
| Kling AI | Physics-accurate motion, longer clips | Web, App | Yes | No | Yes | Yes (separate billing) | $6.99/mo |
| Pika | Fast, stylized social clips | Web, App | Yes | No | Yes | No | $8/mo |
| Luma Dream Machine | Multi-model aggregation, photorealism | Web | No (as of mid-2026) | No | No | Yes | $30/mo |
| PixVerse | Anime and effects-heavy social video | Web, App | Yes | Limited | No | Yes | $9.99/mo |
| Hailuo AI | Budget-friendly realistic motion | Web, App | Yes | No | No | Yes | $7.99/mo |
Pricing changes often in this category, so treat the table as a starting point and confirm current rates on each vendor’s site before you commit to an annual plan.
Magic Hour — Best Overall Image-to-Video AI Tool
Magic Hour built its reputation on face swap and lip sync, then expanded into a full suite that now includes text-to-video, image-to-video, an ai image editor, video upscaling, and audio tools, all inside one credit pool. What separates it from the rest of this list is that you can chain those tools together: generate a clip, upscale it, and animate it in a single workflow instead of exporting and re-importing between apps.
Pros:
- Strong, natural results for face swap ai and lip sync ai, two of the hardest problems in this category
- No signup required to try the tool, and credits never expire once earned
- One-click multi-step workflows (generate, upscale, animate) instead of separate tools
- Access to multiple frontier AI video models under one subscription
- Parallel generations with no concurrency cap on paid plans, so you’re not waiting in a single queue
- Full API access on every paid tier, with parity to the web app
- Weekly feature releases, so the toolset keeps expanding rather than going stale
- Genuinely usable free plan, not just a demo screen
Cons:
- With this many tools in one app, new users can spend a few minutes finding the right one for a specific job
- Heavier 4K workflows are reserved for the Business plan
- Some frontier models available through the API are queued behind priority tiers during peak load
If your work regularly touches image to video ai, face swap, and lip sync in the same project, Magic Hour is hard to beat — it’s the only platform on this list that treats those three as one connected workflow instead of three separate products.
Pricing: Free plan with no credit card required. Creator: $15/month, or $10/month billed annually (120,000 credits/year). Pro: $39/month, or $25/month billed annually (300,000 credits/year, 1472px export). Business: $99/month, or $66/month billed annually (4K export, unlimited concurrent generations).
Runway — Best for Cinematic Editing
Runway earned its reputation as a filmmaking tool first and an AI video generator second, and that shows in how much editing power sits around its Gen-4 and Gen-4.5 models. It’s the platform most likely to show up on a professional production’s toolchain.
Pros:
- Strong character and scene consistency across shots
- Full editing suite (Aleph, Act-Two) built around the generation models, not bolted on
- Reference-image system keeps faces and outfits consistent across different angles
Cons:
- Credit-based pricing punishes retries, and generation failures can still burn credits
- Face swap and talking-photo features are limited compared to purpose-built tools
- Users report long queue times, even on paid tiers, during high demand
Runway is worth the price if your primary output is polished, cinematic footage and you’re comfortable managing a credit budget carefully. It’s a weaker choice if face swap or lip sync is central to your workflow.
Pricing: Free plan with limited credits (no rollover). Standard around $15/month monthly or $12/month billed annually. Pro around $28/month annually. Unlimited plan available for heavy users, with a slower “Explore Mode” for uncapped generation.
Kling AI — Best for Longer, Physics-Accurate Clips
Kling has grown from a niche Chinese video model into one of the more technically impressive general-purpose generators, particularly for motion that involves running, jumping, or fast camera movement.
Pros:
- Handles complex motion and fast action more cleanly than most competitors
- Free daily credits make it easy to test before paying
- Native audio and lip sync support added in recent updates
Cons:
- Tiered pricing with list, promotional, and renewal rates makes true cost hard to predict
- No credit rollover, so unused monthly credits are lost
- Face swap is not a core feature
Pricing: Free tier with daily credits. Paid tiers run from roughly $6.99/month (Standard) up to $127.99/month (Ultra), with the mid Pro tier around $25.99/month. Annual billing saves roughly a third off list price.
Pika — Best for Fast, Stylized Social Clips
Pika (formerly Pika Labs) leans into short, effects-driven content — the “Pikaffects” that melt, inflate, or explode objects in a clip are still one of its clearest differentiators from more literal, cinematic competitors.
Pros:
- Fastest turnaround on this list for short clips, often under 90 seconds
- Distinctive creative effects not replicated well elsewhere
- Lower entry price than most direct competitors
Cons:
- Clips are capped at around 10 seconds, limiting narrative use
- Photorealism and scene consistency trail Runway and Kling
- No face swap and no API access on consumer plans
Pricing: Free tier with roughly 80 monthly credits (watermarked, 480p). Paid plans start around $8/month, with Pro around $28/month and a higher Fancy tier around $76/month for high-volume teams.
Luma Dream Machine — Best for Multi-Model Aggregation
Luma’s newer Dream Machine pricing wraps its own Ray models together with third-party models like Veo and Kling in one subscription, positioning it as a one-stop shop rather than a single-model tool.
Pros:
- Photorealistic output quality that holds up well against dedicated cinematic tools
- Access to multiple third-party models from a single dashboard
- Fast generation speed relative to output quality
Cons:
- No free tier on the current pricing ladder, unlike most of this list
- Entry price ($30/month) is higher than comparable tools with a free option
- No dedicated face swap or lip sync tooling
Pricing: Plus around $30/month, Pro around $90/month, Ultra around $300/month, all with roughly 20% savings on annual billing. Team and Enterprise plans are quote-based.
PixVerse — Best for Anime and Stylized Effects
PixVerse has built a loyal following among social creators who want anime-adjacent styles and camera effects without the steeper price of a cinematic-first tool.
Pros:
- Strong stylized and anime output that few competitors match
- Generous free daily credits for testing
- Fast generation speed suited to high-volume social posting
Cons:
- Photorealism lags behind Kling, Runway, and Magic Hour
- Pricing shifts more frequently than larger competitors, so published rates can go stale fast
- Face swap capability is limited compared to purpose-built tools
Pricing: Free tier with daily credits (watermarked). Standard around $9.99/month, Pro around $34.99/month, with higher Master and Max tiers for studio-scale usage.
Hailuo AI — Best Budget Option for Realistic Motion
Hailuo (from MiniMax) has positioned itself as the budget-friendly alternative to Kling and Runway, and for straightforward realistic motion, it delivers more than the price suggests.
Pros:
- Strong physics simulation for a budget-tier tool
- Entry plan is the cheapest on this list with real commercial usage rights
- Fast generation, typically under 90 seconds per clip
Cons:
- A steep resolution multiplier means 1080p renders burn through credits far faster than the headline price implies
- No face swap or lip sync features
- Style range is narrower than PixVerse or Kling
Pricing: Free tier available. Entry plan around $7.99/month for 1,000 monthly credits, scaling up to roughly $199.99/month for studio-level usage.
How We Chose These Tools
Every platform on this list was evaluated the same way: sign up for the free tier where available, generate the same set of test inputs — a portrait photo, a product shot, and a short script for lip sync — and compare output quality, generation speed, and how far the free or entry-tier credits actually stretched in practice. Pricing was checked directly against each vendor’s live pricing page rather than pulled from older reviews, since this category revises pricing often enough that even a few months makes a difference.
We weighted four factors: output quality (does the motion look natural, and do faces stay consistent), face swap and lip sync accuracy specifically, since those are the hardest problems in this space, pricing transparency (can you predict your monthly cost, or does the credit system obscure it), and workflow flexibility — whether a platform lets you combine steps like upscaling and animating without leaving the tool.
The Market Landscape and Emerging Trends
The AI video generation market is growing fast — industry estimates put the category at roughly $700–950 million in 2025–2026, and that growth is showing up in how fast these tools are shipping new models. A year ago, most platforms offered one general-purpose video model. Now, aggregator-style tools that let you switch between several underlying models in one subscription are becoming common, because no single model wins on every dimension of quality, speed, and cost.
Native audio generation, once a separate add-on, is becoming a default feature rather than a premium one, and multi-shot storytelling — stringing several connected clips into a single coherent scene — is moving from an experimental feature into a standard offering. Face swap and talking-photo tools remain a smaller, more specialized niche than general text-to-video, which is part of why platforms like Magic Hour that treat it as a first-class feature rather than an afterthought stand out.
For teams doing longer-form video work, it’s also worth keeping an eye on tools like Synthesia and InVideo AI, which specialize in avatar-driven and template-based video production rather than photo animation — useful complements if your workflow extends beyond image-to-video into full explainer or training content.
Final Takeaway
If you need one platform that handles image-to-video, face swap, and lip sync well and don’t want to juggle three subscriptions, Magic Hour is the strongest overall pick, and its free tier is generous enough to test before you commit to a plan. If cinematic editing and shot consistency matter more than face swap, Runway remains the strongest dedicated tool. Kling AI is the better choice for longer clips with complex motion, Pika wins for fast, stylized social content, and Hailuo is the most budget-friendly option if photorealism at low cost is your only priority.
Whichever tool you land on, spend an afternoon testing the free tier with your own footage before subscribing. Every platform’s marketing demo looks better than your actual use case will — the only way to know which one fits is to run your own photos through it.
FAQ
What is the best image-to-video AI tool in 2026? Magic Hour is the strongest all-around option, particularly if your workflow includes face swap or lip sync alongside image-to-video. Runway and Kling AI are the stronger picks for purely cinematic, text-driven video work.
Is Magic Hour free to use? Yes. Magic Hour offers a free plan with no signup required to start, and no credit card is needed to try its core tools. Paid plans start at $10/month billed annually for more credits, higher resolution, and commercial use rights.
Which AI tool offers the best face swap? Magic Hour’s face swap tools are the most refined among the platforms tested here; most general-purpose video generators, including Runway, Kling, and Pika, don’t offer dedicated face swap features at all.
Can AI actually generate a believable video from a single photo? Yes, for most use cases. Modern image-to-video models can animate a still photo with natural motion, and platforms like Magic Hour can add lip sync or face swap on top of that animation. Quality still varies with photo resolution, lighting, and how complex the requested motion is.
Which platform is best for creators on a tight budget? Hailuo AI and Pika have the lowest paid entry points, but Magic Hour’s free tier and $10/month Creator plan (annual billing) offer more functionality per dollar once face swap and lip sync are part of the requirement.

Introduction
Creating custom signage that perfectly captures a business’s identity and draws in new customers is both an art and a science. In a fast-growing city like Austin, standing out through exceptional signage can make a significant difference in brand visibility and local success. That’s where custom signs in Austin become vital, offering tailored solutions to address the diverse and unique challenges local businesses face. Signs Austin addresses these needs through a fully integrated approach that combines top-notch materials, cutting-edge manufacturing, and experienced professionals. The company’s reputation for quality and reliability has made it a trusted partner for organizations across Austin seeking to refresh their branding or launch new ventures. Their collaborative process ensures a seamless experience, from initial concepts to final installation. Investing in professional signage is not just about aesthetics; it impacts customer perception, regulatory compliance, and long-term brand integrity. Signs Austin’s dedication to detail and compliance with local laws minimizes headaches for business owners. It ensures that all products are designed to thrive in Central Texas’s unique climate and environment. As businesses increasingly seek ways to set themselves apart from the competition, quality signage plays a crucial role in their marketing strategy. Working with experts who understand local codes, building restrictions, and business goals can streamline the entire project and provide peace of mind and outstanding results.
What Services Does Signs Austin Offer?
Custom Sign Design and Fabrication
Signs Austin specializes in designing and crafting one-of-a-kind signage that captures a brand’s identity and communicates its message clearly. Skilled graphic artists collaborate with clients to ensure that every design not only looks professional but also aligns with marketing objectives and company values. Utilizing the latest technology in the fabrication process allows for precise reproduction of colors, logos, and complex shapes.
Vehicle Graphics
For companies looking to expand their reach, vehicle wraps and graphics transform service vessels into attention-grabbing mobile billboards. These graphics are engineered for durability, resisting the intense Texas sun and regular wear. By leveraging vehicle advertising, businesses gain prominent exposure at every job site and event they attend.
Interior and Exterior Signage
From welcoming lobby signs to eye-catching monument signs at driveways, Signs Austin delivers solutions that elevate both interior environments and outdoor experiences. The thoughtful selection of materials and designs ensures not only aesthetic appeal but also longevity and consistency with the business’s brand voice.
ADA and Wayfinding Signage
Navigating a building or campus is much simpler when wayfinding solutions are clear and strategically placed. Signs Austin also prioritizes accessibility, offering ADA-compliant signage that meets federal and state guidelines. This ensures that all visitors, including those with disabilities, benefit from effective signage and navigation throughout the property. Businesses that want to learn more about how effective signage can impact customer acquisition and brand perception can refer to industry resources for additional insight.
How Does Signs Austin Ensure Quality and Compliance?
With a track record spanning 35 years, Signs Austin has developed robust processes to ensure that every sign adheres to local building codes and safety standards. The experienced production specialists, technical installers, and designers stay informed of updates to municipal regulations, helping clients avoid delays or costly modifications. Adherence to quality benchmarks results in signs that not only look great, but last for years under harsh weather and high-traffic conditions. The company also partners closely with clients during material selection, offering recommendations based on intended sign placement and expected exposure. Options might include durable metals, weather-resistant plastics, or specialty finishes meant to complement modern or historic architecture. This collaborative process produces custom solutions tailored precisely to each business’s needs. In addition to following best practices for compliance, the team is dedicated to environmentally responsible production. This means opting for materials and manufacturing processes that minimize waste and reduce the ecological footprint.
What Is the Process for Working with Signs Austin?
- Consultation: The first stage involves meeting with clients to understand their business, goals, and specific signage needs. This open dialogue ensures that expectations, requirements, and timelines are clear from the outset.
- Design: Signs Austin’s artists create mockups and revisions in line with the company’s vision. Adjustments are encouraged to ensure the final design perfectly aligns with the client’s brand strategy.
- Permitting: Navigating Austin’s permitting landscape can be tricky. Signs Austin manages all required permit applications and ensures each sign complies with city ordinances and building codes.
- Fabrication: Once designs are finalized and permits are issued, the team fabricates the signage in-house, using the highest quality materials for durability and vibrancy.
- Installation: Certified installers handle the placement, securing every sign safely and ensuring maximum visibility. This stage is where the vision comes to life and the benefits of a unified process become clear.
Why Choose Signs Austin for Custom Signage Needs?
Signs Austin stands out for its dedication to craftsmanship, compliance, and customer satisfaction. The company’s full-service capabilities mean fewer handoffs, streamlined communication, and a superior finished product. With a local team that understands Austin’s culture, business landscape, and regulatory needs, companies can trust that their signage will work hard for them from day one. As a local partner invested in community success, Signs Austin continues to earn the trust of clients large and small through flexibility, clear communication, and exceptional results.
Conclusion
Effective signage is a critical asset for any Austin business hoping to increase visibility and communicate brand values with impact. Whether launching a new business, updating an existing sign, or expanding through mobile advertising, working with a reputable provider ensures projects are completed smoothly and professionally. By focusing on quality, compliance, and customization, Signs Austin delivers signage solutions that drive results and exceed expectations. Investing in professionally designed and installed signage not only strengthens brand recognition but also attracts potential customers and creates a lasting first impression. From eye-catching storefront displays to vehicle wraps and interior graphics, the right signage can support long-term marketing goals while enhancing the customer experience. Choosing an experienced signage partner ensures that every project reflects your brand identity, meets local regulations, and delivers lasting value to your business.
-

 HEALTH2 years ago
Integrating Semaglutide into Your Weight Loss Plan: A Practical Guide
-

 HOME IMPROVEMENT2 years ago
How to Choose the Perfect Neutral Area Rug for Every Room
-

 FASHION2 years ago
7 Celebrity-Inspired Elegant Summer Dresses For 2024
-

 LAW2 years ago
Teenage Drivers and Car Accidents in California: Risks and Parental Liability
-

 CONSTRUCTION2 years ago
Construction Site Safety Regulations in New York and Your Rights as a Worker
-

 HOME2 years ago
Sandra Orlow: The Teen Model Who Captivated the Internet
-

 LAW2 years ago
Post-Divorce Considerations in California: Modifications and Long-Term Planning
-

 FINANCE2 years ago
Digital Asset Management in Florida Estate Planning